


How we use Github Actions for CI at Udgama.
Recently, at Udgama, for our projects, our engineering team started using Github Actions for Continuous Integration (CI). This blog will give you a brief idea of how you can iterate faster with Github Actions for your projects and what is the transition process we used to switch to the Agile CI model.
What is Continuous Integration?
Continuous Integration is a software development practice where team members integrate their work regularly. Each person integrates at least once every day, by pushing the code to a specific Github repository. There is an automated build (including test) to check the code that is pushed to the Github integration branch so that the errors are detected and fixed as quickly as possible. This approach has significantly reduced integration problems and allows a team to develop cohesive software more rapidly.
What are Github Actions?
Github Actions are small scripts that run on any event getting updated on Github for the common Github features, like opening a pull request, creating an issue, merging into any branch, etc. It allows you to create a custom workflow for your Github Repository. Github Actions let you automate literally anything you can think of, including running tests, deploying builds to production, labeling PRs based on changed files.
This is how Github Actions can be accessed from your Github account

Let’s get started
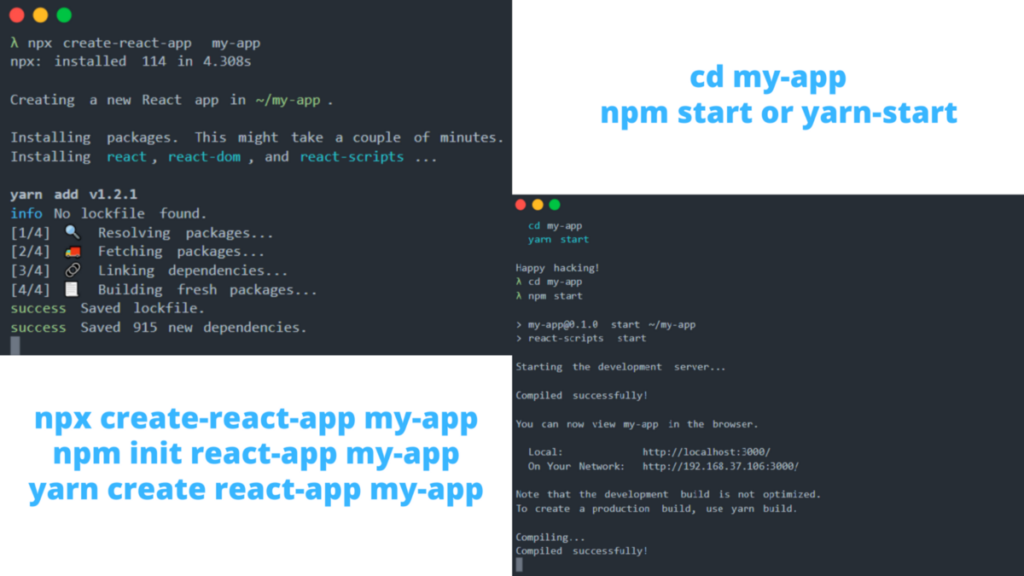
The first thing is to create our react project, we are using create-react-app
- Open your terminal and run
npx create-react-app my-app
- Create a repository on GitHub
- Add the git remote origin to your project
- Add the workflow template to your Github Repository of this project
Go to the Actions Page in your Github Repo
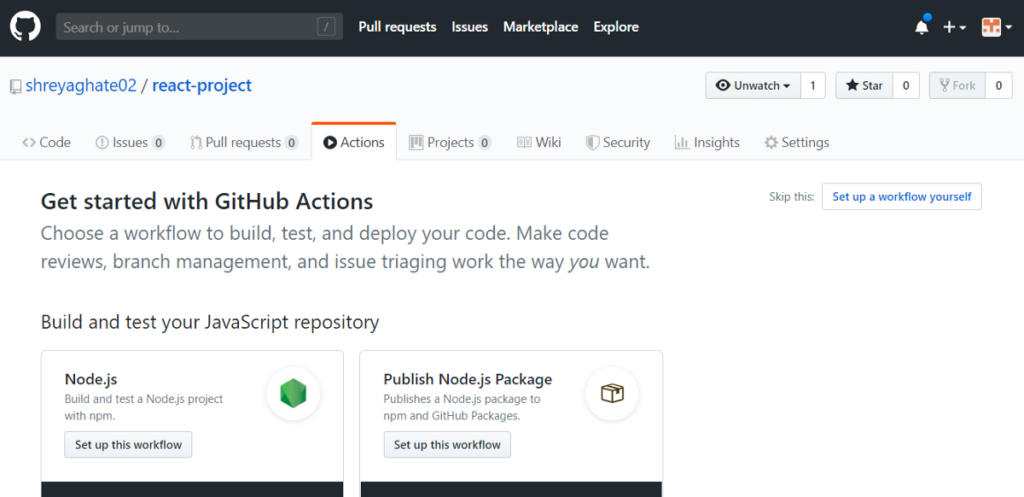
- Add the workflow template to your Github Repository of this project (Node.js) You can add any workflow of your choice with the template Github provides as per your project
In the marketplace for actions (RHS), you can explore various actions available eg. CI, ESlint, etc.
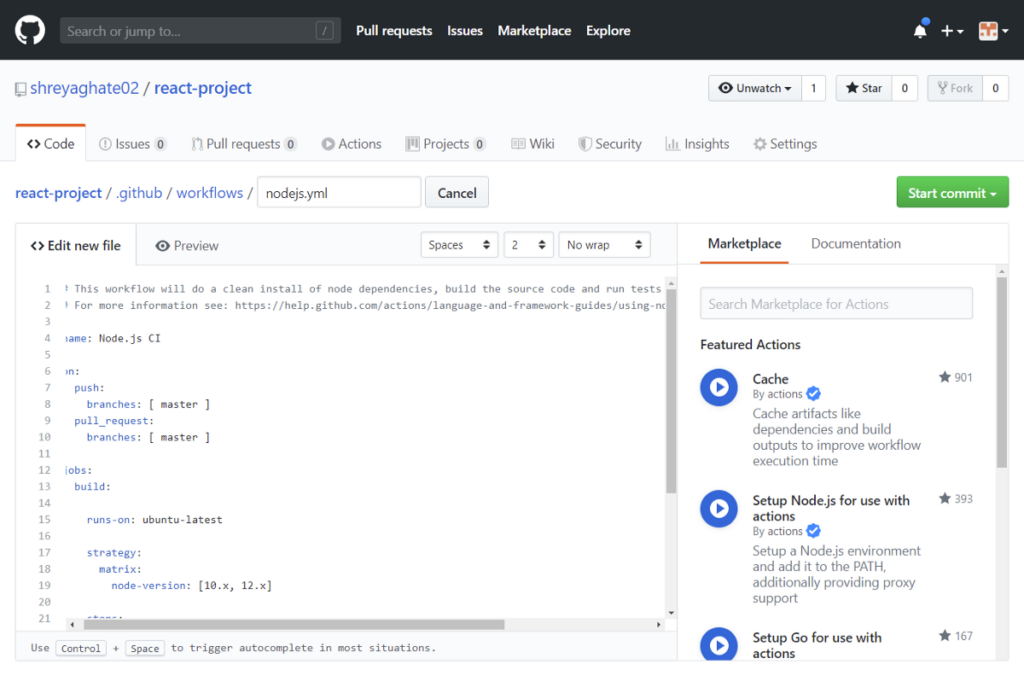
You can read about how the workflow syntax is designed
The workflow file, that you see in the image is a default code provided by Github to perform Actions over your code. You can choose to modify the workflow file as per your project requirements. For example, check the workflow file code below to understand how Gitflow is added to the workflow for our project
Our Project Includes :
React using Typescript and Javascript
Testing with Jest and Enzyme
Linting with ESlint
Gitflow as a workflow for code development
Atlassian Jira for Agile software development process tracking
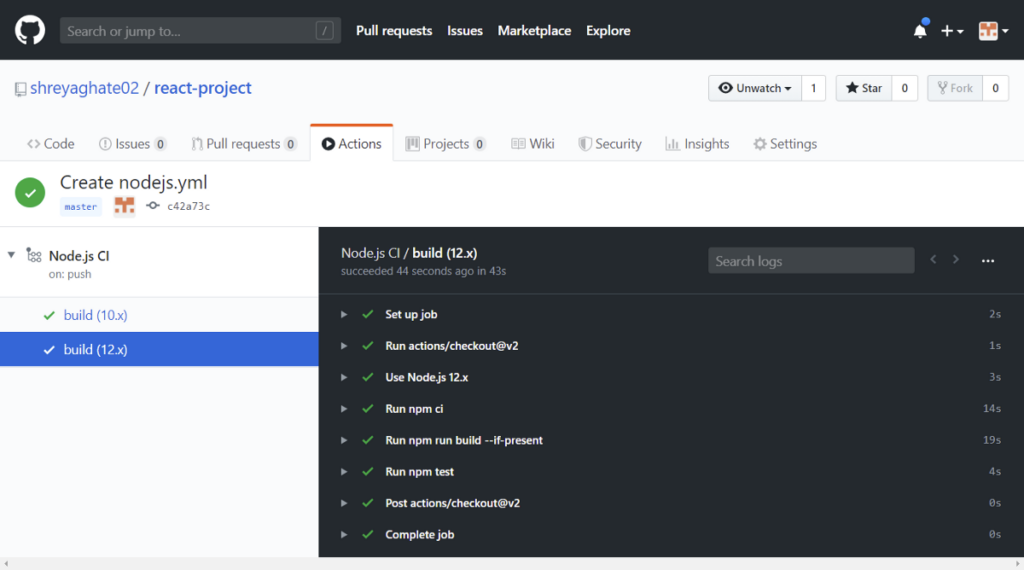
Thus after configuring our workflow file as per our requirements, it looked like
NodeJS.yml
name: Node CI
on:
    pull_request:
        branches:
            - master
            - develop
jobs:
    build:
        runs-on: ubuntu-latest
        strategy:
            matrix:
                node-version: [12.x]
        steps:
            - uses: actions/checkout@v1
            - name: Use Node.js ${{ matrix.node-version }}
              uses: actions/setup-node@v1
              with:
                  node-version: ${{ matrix.node-version }}
            - run: npm install -g yarn
            - name: yarn install, build, and test
              run: |
                  yarn
                  yarn lint
                  yarn build
                  yarn test
              env:
                  CI: true
As we follow the Gitflow for the workflow for our project
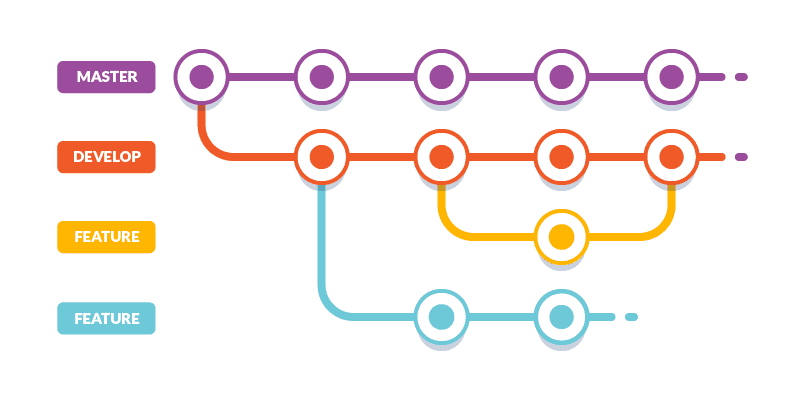
Our branches of the code :
- Master branch
- Develop Branch
- Features branches
The develop branch contained the integrated code of the various team members. While the feature branch consisted of the individual code of the members which they worked upon.
Since there are many members working on a project, pull requests were the main workflow model that we used to integrate the code of various feature branches into one integrated branch — develop.
Let’s understand with a real scenario :
There are two members of a team named A and B,
- When A was ready to begin working on a new feature in the project, A first ensured that she local branch is up-to-date with the remote master branch. (In our case, we added the Github Workflow dir to our master branch)
$ git pull origin master
2. A then created a new feature branch on the local machine with the name “ABC” and started working on that.
$ git checkout -b ABC
3. Once, A finished the work on the ABC feature, she then pushed this new branch to the remote repo with the branch name ABC.
$ git push -u origin ABC
4. A then continued working on that feature ABC, and regularly pushed the code to her branch named ABC. Before pushing it to the Github repository, A makes sure she tests and lints the code manually locally by using (to avoid any error in the local project itself to be fixed before pushing)
$ npm test or yarn test
$ npm lint or yarn lint
Once all the tests pass successfully, A pushed her code to Github repo.
Every developer does at least one daily push to the Github repo, for saving the work done daily.
Also, A only pushed her code to the ABC branch (feature branch) and not to the master. Every time, for updating her ABC branch with her updated code, she performed the following commands
$ git add .
$ git commit -m "Update"
$ git push origin ABC
5. When A felt that feature ABC was ready to be merged with the Develop Branch, A went to the project Github repo and opened a pull request on the ABC branch, adding B as the code reviewer.
This helps B to understand the code is error free and can be reviewed and merged into the Develop/Master branch, B would then review the PR and merge the code in the develop branch if the code is error free, else request A to fix the errors.
$ git fetch ABC
# This would pull the ABC branch from remote and make a local copy of ABC in B’s local machine
$ git checkout ABC
# B would then code review, if everything looked good B would close the pull request and merge A code in the Develop Branch.

6. Once the Develop Branch has the code of the ABC feature, then B will pull the Develop Branch to get the latest code and then start working on the XYZ feature of the project by doing yarn install.
Then once the code is ready, B pushes the code to the XYZ Branch similar to A and sends a Pull Request for merging the XYZ Branch into Develop by following the commands written below
$ git checkout XYZ
$ git pull origin develop
# Git would show the potential conflicts which B would resolve
$ git add .
$ git commit -m "Update"
$ git push origin XYZ
For every Pull Request to the Develop Branch, there is a CI workflow that will be activated and run over the code as seen in the above Github Actions Workflow.

Once, all the features are developed and completed, they are then merged into the Master branch for the release process of the project.
By using Gitflow workflow, Pull Requests, Github Actions for Continuous Integration helped us integrate faster, gave code coverage and the way we created and managed our code across various projects. It helps us in component wise development and merging of code, which enables us to reuse the code, whenever required. It enabled our agile software teams to iterate and integrate faster. We are in the process of improving our processes and using the latest tech stack for software development.
I hope it helps you understand the flow of how Github Actions helps you integrate continuously and efficiently. If you have any doubts or suggestions, comment below.