


Multilingual chat with Pubnub and Amazon Translate
This blog is a demo of how you can add multilingual chat functionality to pubnub/typescript-ref-app-team-chat . This demo will be a good start to understand how Amazon Translator API works.
So let’s get started.
First, you have to download or clone pubnub-typescript-ref-team-chat from github. Follow the instructions given there and create a PubNub keyset. Insert them into the cloned project. Run the project see how this chat-demo works. Go through the code and get familiar with the project.
Now, we require AWS access key and AWS secret access key (which we will get by creating IAM user )for the Amazon translate module which we are going to import in Pubnub.
- Create an account on AWS by using the link.
2. Login to your AWS account. And search for IAM from the Find Services search box.
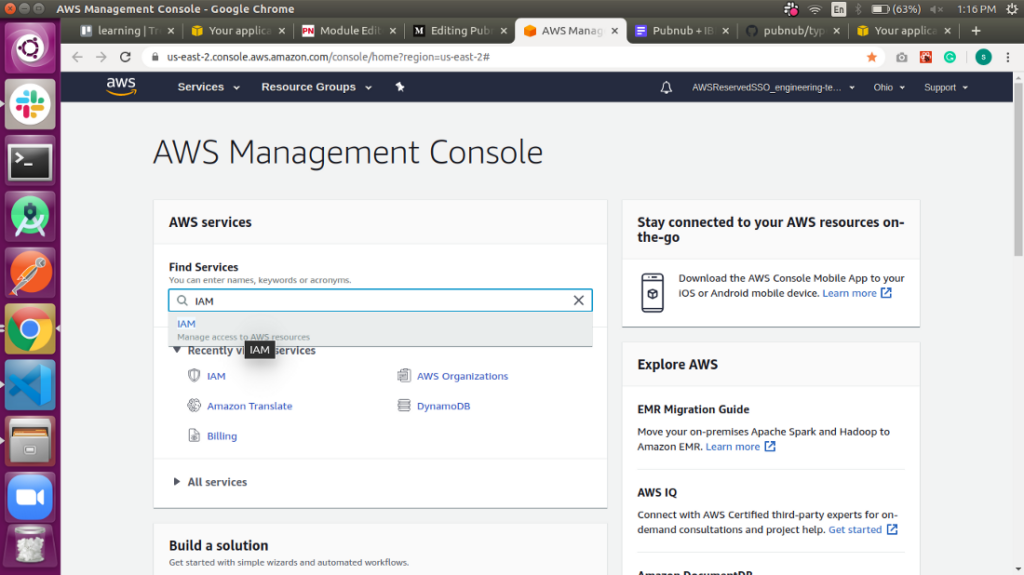
3. Click on IAM from the search. Select Users from the left side of the screen. Click on the Add user button. Give the User name. (You can give any user name.). Access type select both Programmatic access and AWS Management Console access. Next, Console password in that you Autogenerate Password or give the custom password. (I am giving the custom password here). Click on Next: Permissions.
4. In Permissions, Select Attach existing policies directly and in that select AdministratorAccess. (AdministratorAccess provides full access to AWS services and resources.). Click on Next: Tags.
5. In Tags, if you have multiple IAM user and you want specific tags like the email of user or address or anything you can specify here. We will skip this and click on Next: Review. Review your details if want to change anything go to Previous and do changes. If everything is fine click on Create User button.
6. When IAM user is created you will see Download .csv to download your AWS keys. Download those keys we will be using them later. Now you will see your IAM user in the IAM User tab.
Now we can start with creating Pubnub Module for translation.
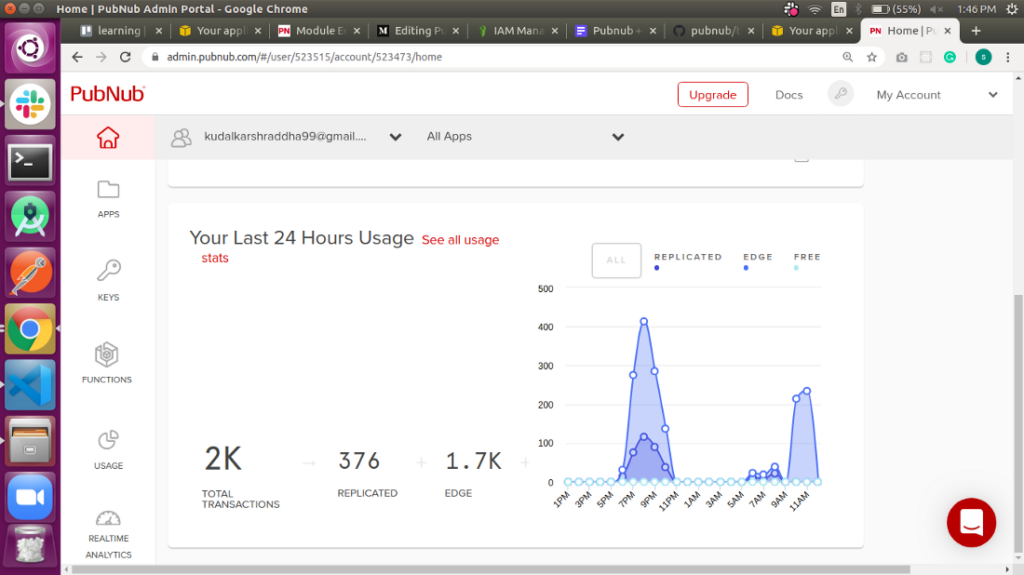
- Create an account on PubNub. And then log in.
2. Go to APPS. Click on CREATE NEW APP button. Give a name to your app and select Other Messaging Use Cases.
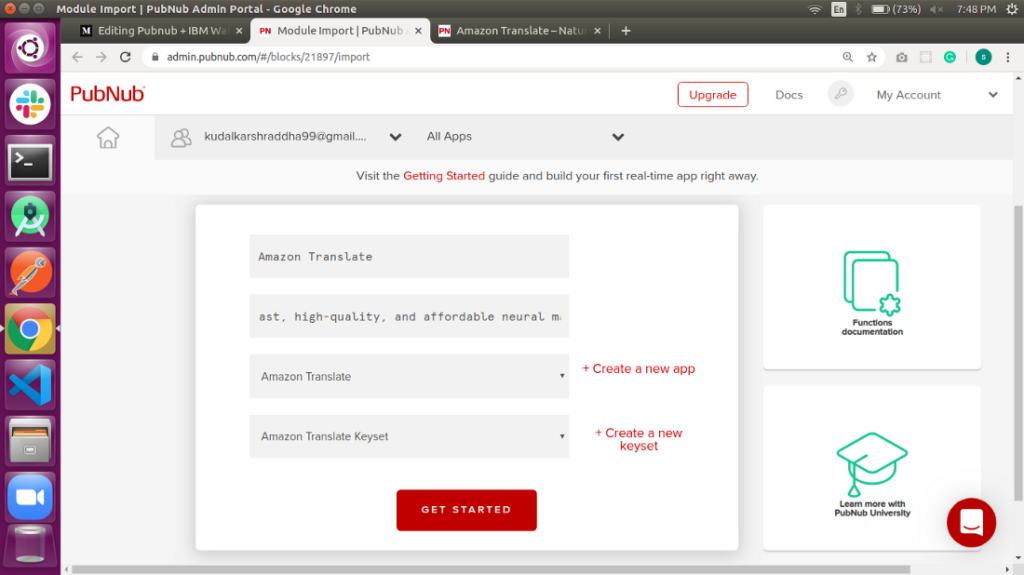
3. Go to FUNCTIONS. Select the app we just created from All apps dropdown menu, if already not selected.
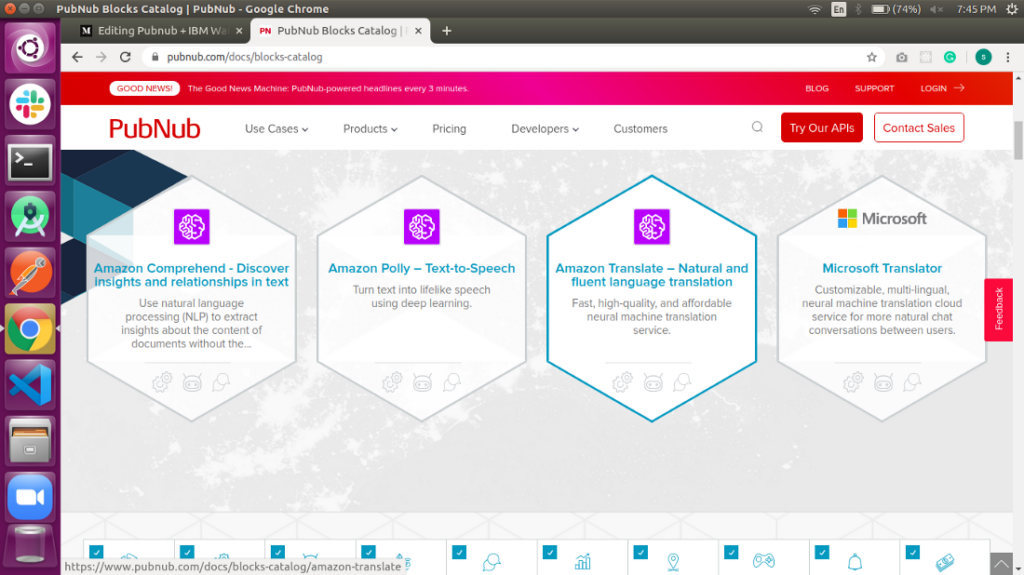
4. Click on IMPORT BLOCK button. Search and select Amazon translate block and then select try it now.
5. On the next screen select app and keyset that we created and click on GET STARTED.
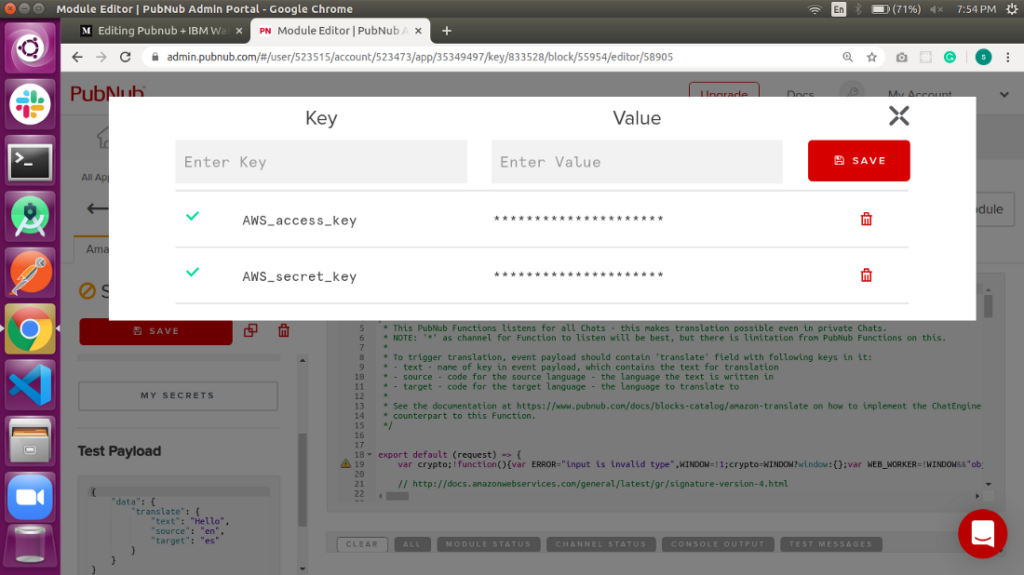
6. Now we have to add our AWS Access Key and AWS Secret Key which we got when we created IAM User for Translate Module to work.
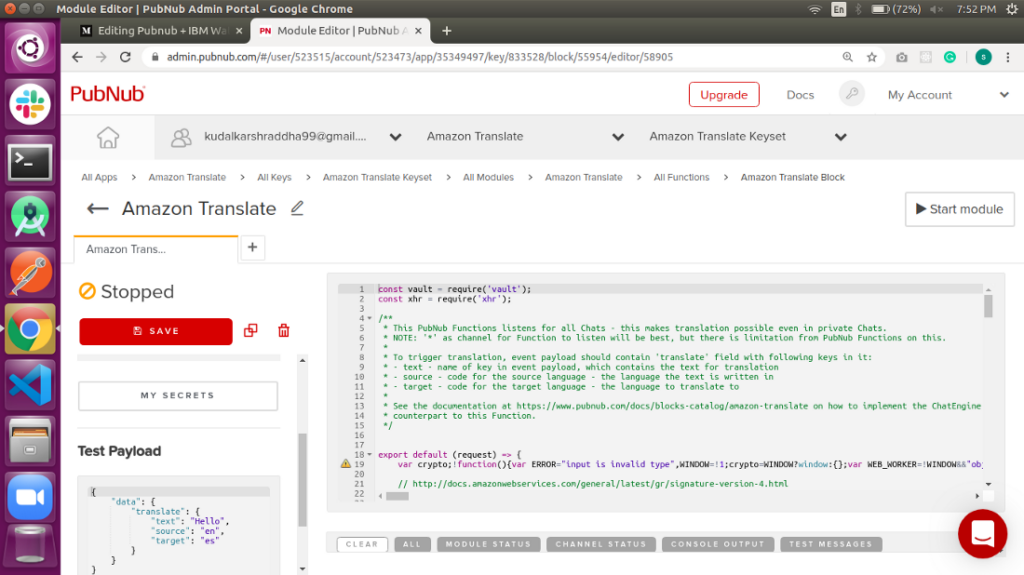
7. Click on MY SECRETS. And add AWS access key and AWS secret key as shown below in key-value pair:
8. Change the channel name to space.* and SAVE. Now our module is ready to work. Click on the Start module. And then click on Publish below Test Payload to check whether the module is working properly or not.
You will get the following output in the console.
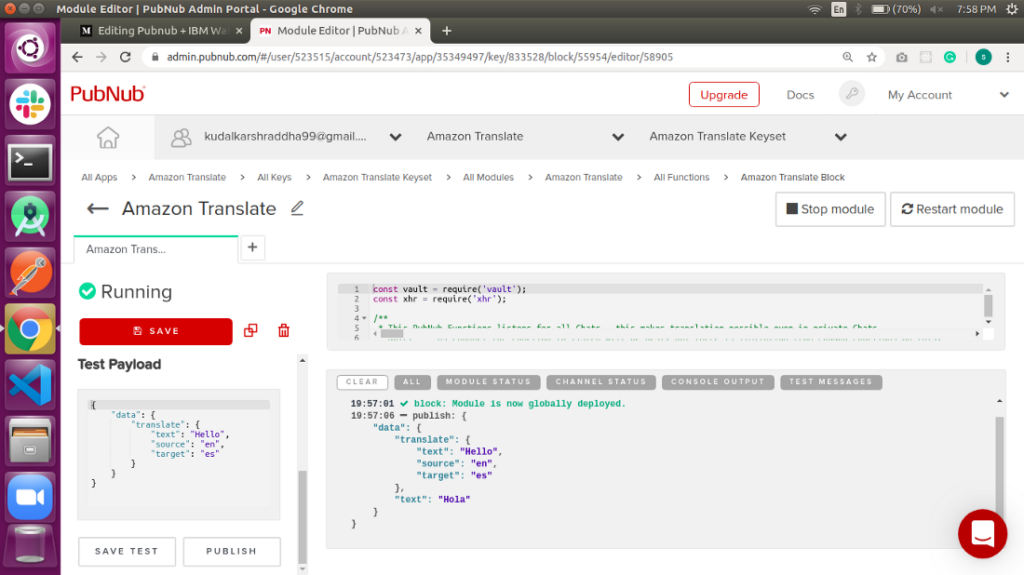
Amazon translate uses codes for different languages. For example, en is for English, and es is for Spanish so our source here is English and the target is Spanish. That is the reason our text got converted from English to Spanish (Hello to Hola).
To know more about Supported Languages and Language Codes go to the link.
Now we have to change a few things in our cloned/downloaded pubnub/typescript-ref-app-team-chat. Open the project in your editor.
Delete keys from file pubnub-keys.json, if you have added any.
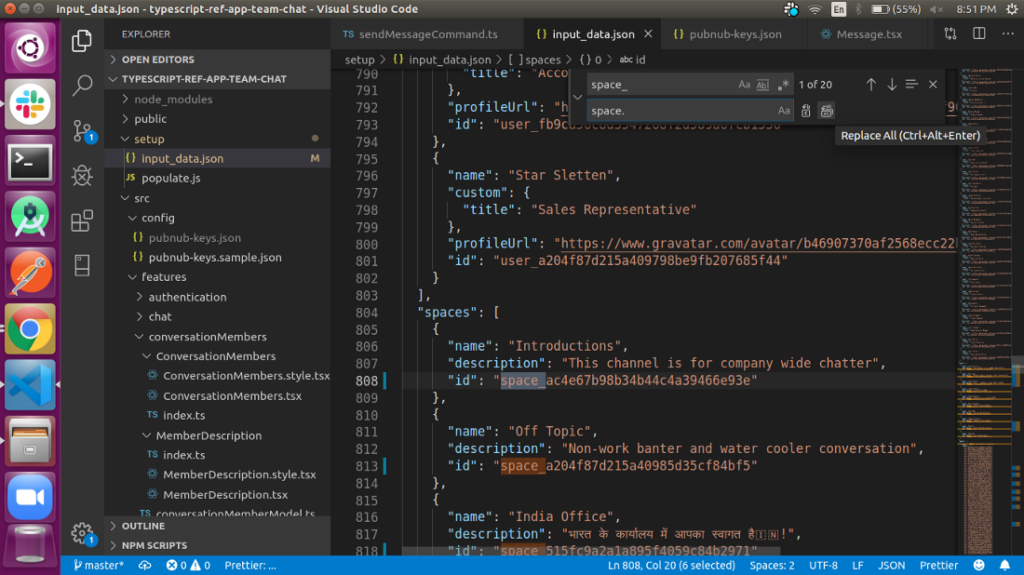
- Go to the input-data.json file in the setup folder. And replace all instances of space_ with space. The reason behind this is that all space ids are channel names that are going to be passed in our Pubnub Translate Module we exported. While creating a module we game channel name as space.* which means that any channel whose name starts with space. will be passed through that module.
2. Next, I added a drop-down list of languages by creating file languageinput.tsx in the header folder. From where we are going to get the target language for translation. By default source language is going to be English as we are going to type our message in English.

3. Now, I changed the MessageFragment interface structure to be able to work with Amazon translate. (I changed files sendMessageCommand.ts, Message.tsx, messageModel.ts).
You can see changes in my github link.
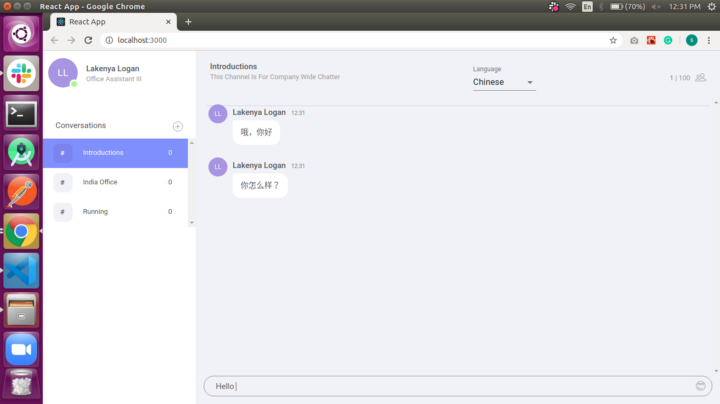
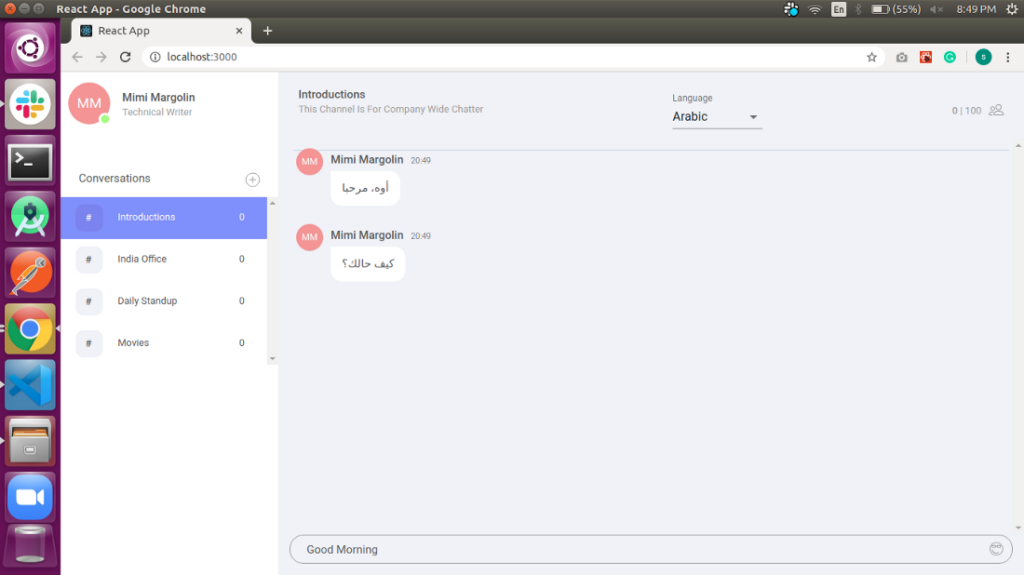
The final translation will look like this.
Hope you liked this blog
- 10 backend mistakes (and their fixes) you must avoid as a Backend Developer

- 5 Frontend Trends You Can’t Ignore in 2022