


What is loopback and how to make Loopback REST-based API application?
What is loopback??
Loopback is an open-source Node js framework which is used to build dynamic end-to-end REST APIs.
Using loopback we can make rest based framework easily.
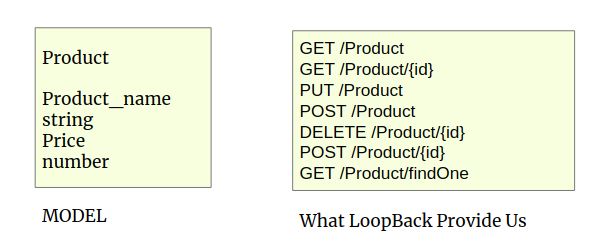
What loopback does for us?
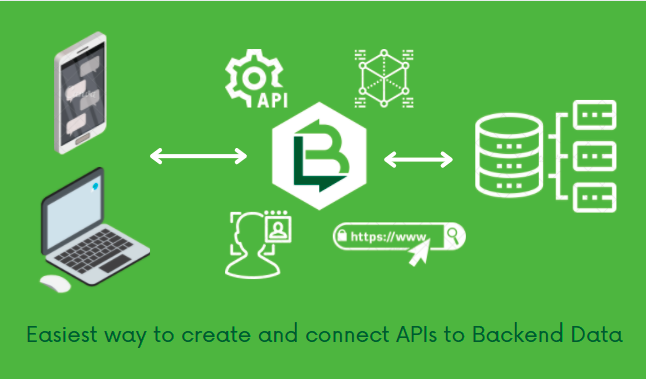
The loopback is a node js framework for creating APIs and connect those APIs with backend data.
Loopback takes a model definition from you and according to the model definition, they generate a fully functional end-to-end REST API.
For eg:
How we can create a LoopBack application:
STEP 1: Install Loopback CLI using npm.
Installing a LoopBack CLI tool make it easier to get started with.
Open the terminal and write the following command to install the LoopBack CLI so that ‘lb’ command can be accessed easily. Through ‘lb’ command we can generate the model.
npm install -g loopback-cli
Make sure you install the LoopBack-CLI globally otherwise you can not access the lb command.
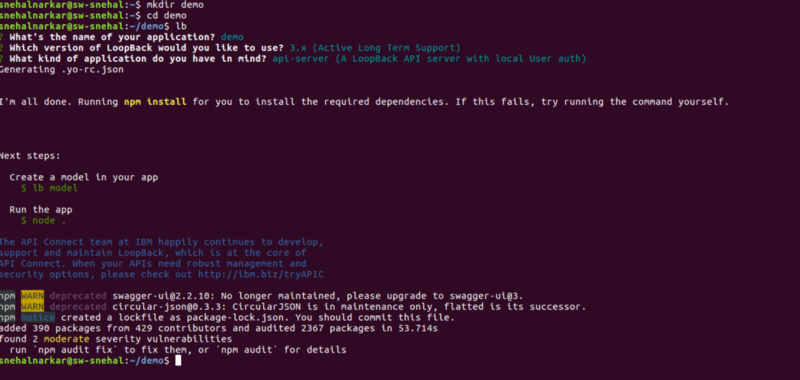
STEP 2: Create Application:
Make a directory where you want to store your project. I will name it ‘demo’. Make sure you have opened this directory in your terminal so that all files will be generated in that directory.
mkdir demo
cd demo
Then enter the following command:
lb
When you enter the command, A lot of questions will be asked, like those displayed in the following image.
Step 3: Run the app:
Run the application using the following command:
node .
After running this command you can see your application on
localhost:3000/explorer
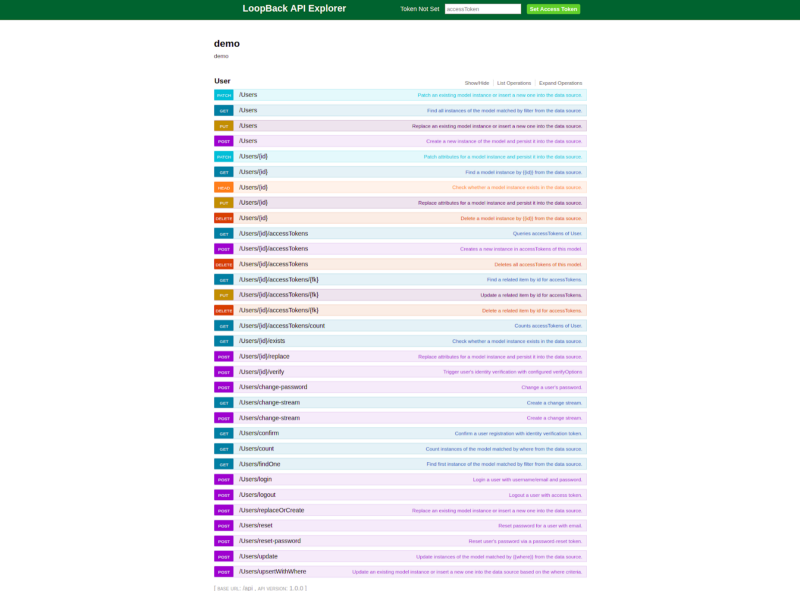
LoopBack set up all the routes or API for you:
In Loopback you don’t need to create a user model to store user data .you will get all the User related GET, POST, PUT, DELETE operations. And also log in, logout, change password everything is present default no need to code.
STEP 4: Connecting to the Database:
If you open datasources.json in the Server folder, you should get something like this:
{
“db”: {“name”: “db”,” connector”: “memory”}
}
This means that presently, the data source being used is the
memory of our computer. If you want to add another database then you can add it.
In this tutorial, I am showing you how to add MongoDB.
1) First, install mongo connector:
npm install — save loopback-connector-mongodb
2) Connect the MongoDB connector by using the following command:
lb datasource mongoDS — connector mongoDB
3) After running the above command you will ask some questions for eg.

4) Now modify your datasources.json because now you are using MongoDB so just remove the memory database from a file. so it will look like the following:
{
“db”: {
“host”: “localhost”,
“port”: 27017,
“url”: “”,
“database”: “demodatabase”,
“password”: “”,
“name”: “mongoDS”,
“user”: “”,
“connector”: “mongodb”
}
}
STEP 5: Creating Data Models:
Run the following command to create data models
lb model
When you enter this command you have to give the answer to some questions to create a model like model name and what kind of properties you need in your model. That question I have mentioned in the following screenshots.
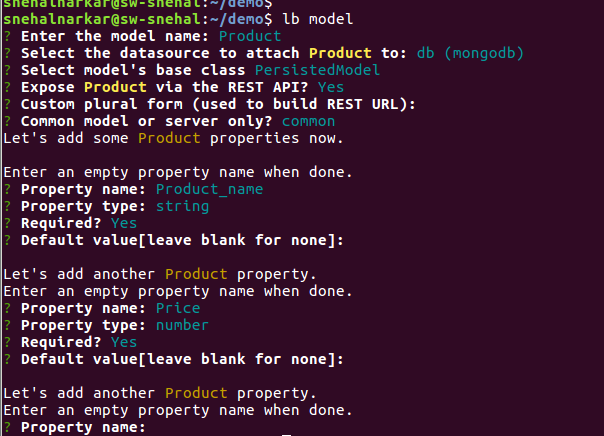
Here I have created the Product Model with Two properties that is Product_name and Price. In a similar way, you can add as many properties as you want.
After running this command you will get your model.json file in common/models folder e.g product.json.You can edit the properties from the product.json file. It is not necessary to use CLI. You can manually add your properties in your model.
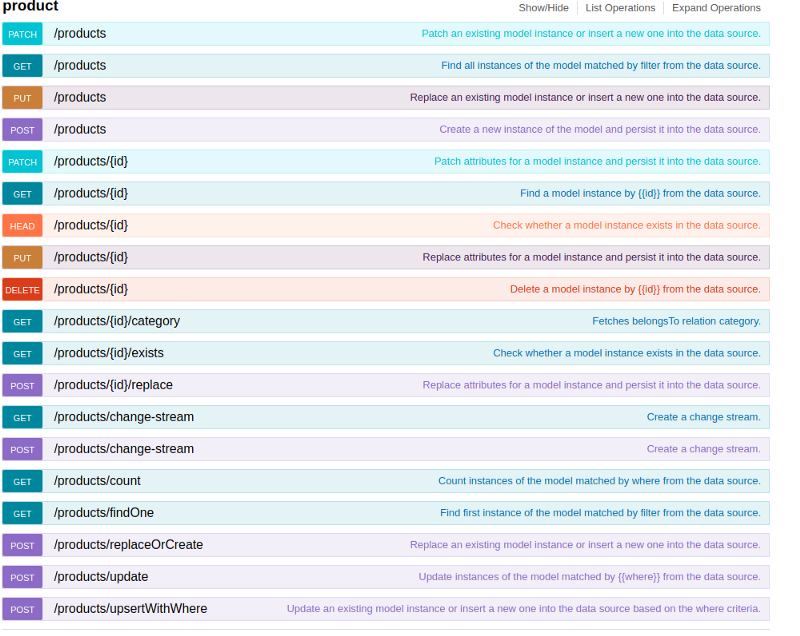
Now Your REST API application is ready Go and checks your application and you will get your model with REST API.Type following command to run the application:
node .
It will look like the following:
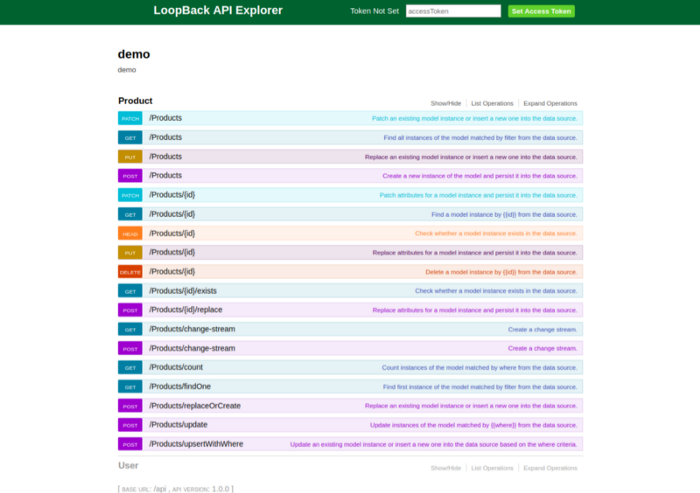
Now you can perform all your CRUD operations [like GET product, POST product, DELETE product, PUT product.]
STEP 6: AUTHENTICATION
In Loopback there is one more feature that is authentication.so using this feature you can easily set up security for your model.
1) To set up authentication, run the following command:
lb acl
2) When you run the above command you can give the read, write and Execute access to your model.

In this, I am adding authentication to the unauthenticated user. Means If the user will be unauthenticated then he can not see or edit the model.
3) Or you can directly add your authentication for the specific Model file. for e.g go to the model_name.json file and add these lines.
 “acls”: [
    {
    “accessType”: “*”,
    “principalType”: “ROLE”,
    “principalId”: “$unauthenticated”,
    “permission”: “DENY”
    }
]
Step7: your app is ready
Now when you run your app using
node .
You will able to see the model that you are created with authentication.
And your model with REST API is ready.
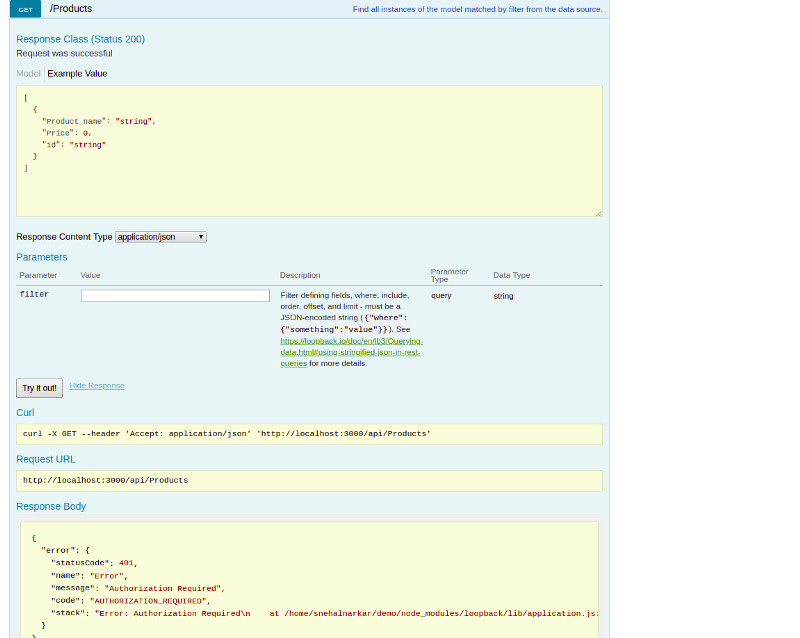
You have added authentication for the unauthenticated user so without login, you are not able to see or edit the product.
1) Go in the user model create a user for the authentication
2) After creating the user goes in the users/login part and log in the user
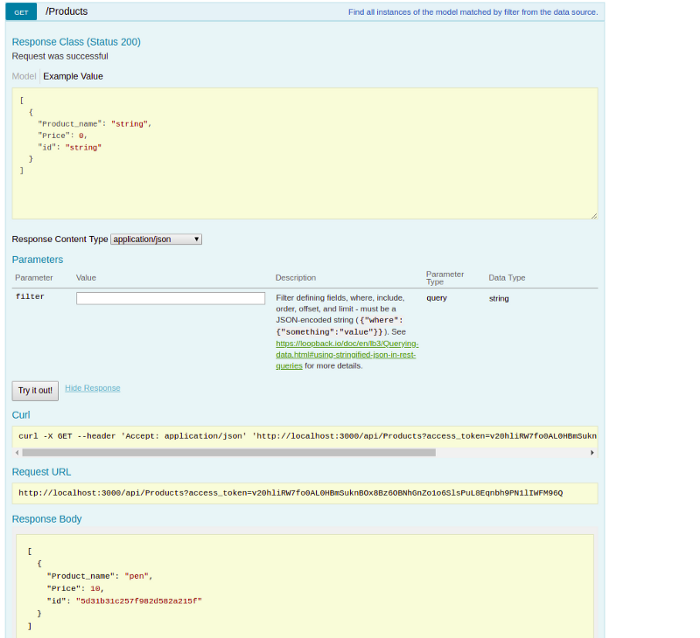
3) After the login, you will get the AccessToken copy that AccessToken and paste it in above where the set access token is written and done now your user is logged in

4) Go and check your model.
Finally, your loopback application is ready with authentication. Enjoy coding
- 10 backend mistakes (and their fixes) you must avoid as a Backend Developer

- 5 Frontend Trends You Can’t Ignore in 2022